TL;DR:
- Proper technical setup and testing are essential for successful streaming beginners.
- Good audio quality and stable internet connection are critical for viewer retention.
- Follow copyright rules and use licensed music to avoid account strikes and legal issues.
Starting a live stream looks simple until you actually try it. The settings panel alone in most streaming software can stop a new creator cold. Bitrate, encoder, keyframe interval, resolution scaling — none of it is intuitive. And beyond the software, there are microphone choices, internet speeds, copyright rules, and platform decisions all competing for your attention at once. The good news is that most streaming failures come from a small set of avoidable mistakes. Get the basics right early, and you can skip weeks of frustrating trial and error.
Table of Contents
- Get your basics right: Hardware, software, and internet
- Audio matters: Standout sound for gamers, musicians, and performers
- Don't overlook your connection: Stable streams win
- Respect copyright and music rights when streaming
- Quick comparison: New streamer musts at a glance
- What most new streamers get wrong — and what actually matters
- Ready to start your streaming journey?
- Frequently asked questions
Key Takeaways
| Point | Details |
|---|---|
| Start with the fundamentals | Focus on reliable hardware, OBS Studio, and bandwidth-aware settings for a strong foundation. |
| Prioritize audio quality | Invest in a good mic or interface and monitor your sound to keep viewers engaged. |
| Choose Ethernet over Wi-Fi | Stable, wired internet prevents dropped frames and keeps your stream consistent. |
| Follow copyright rules | Always use licensed music and understand platform policies to avoid strikes. |
| Gear doesn’t guarantee success | Your content, consistency, and viewer experience matter more than expensive equipment. |
Get your basics right: Hardware, software, and internet
The first real decision most new streamers face is software. OBS Studio (Open Broadcaster Software) is the most widely recommended starting point for a reason. It is free, it runs on Windows, Mac, and Linux, and it gives you direct control over every stream setting. According to streaming fundamentals research, bitrate is one of the most common failure points for beginners — set it too high and your stream stutters; set it too low and your video looks blurry.
Bitrate is the amount of data your stream sends per second, measured in kilobits per second (kbps). Your upload speed sets the ceiling for how high you can safely go. A good rule is to use no more than 70 to 75 percent of your available upload bandwidth for your stream, leaving headroom for other data.
| Resolution | Frame rate | Recommended bitrate | Minimum upload speed |
|---|---|---|---|
| 1080p | 60 fps | 6,000 kbps | 8 Mbps |
| 1080p | 30 fps | 4,500 kbps | 6 Mbps |
| 720p | 60 fps | 4,500 kbps | 5 Mbps |
| 720p | 30 fps | 3,000 kbps | 4 Mbps |
Most new streamers overestimate their bandwidth. Run a speed test at peak hours — evening, when your neighbors are also streaming — not at 2 AM when your connection is at its best. That slower number is your real working speed.
You can follow a full step-by-step streaming guide to walk through the setup in detail, but a few things are worth calling out here. Set your encoder to "x264" unless your graphics card supports hardware encoding well. Start with the "veryfast" preset in OBS. This balances CPU load against image quality. As you get more confident, you can test slower presets.
Common early mistakes to avoid:
- Streaming over Wi-Fi on a shared home network
- Not testing your setup before going live for the first time
- Setting bitrate higher than your upload can handle consistently
- Using the wrong audio sample rate (stick with 48 kHz to match most platforms)
- Forgetting to monitor your stream health stats during a broadcast
Pro Tip: Run your first two or three test streams as unlisted or private. Watch the recorded version back. You will catch audio issues, layout problems, and lag before your audience does.
Pair these technical settings with solid streaming best practices and your stream health will improve quickly. The foundation does not need to be expensive. A mid-range gaming PC or even a decent laptop from the last three years can handle 720p streaming without breaking a sweat.
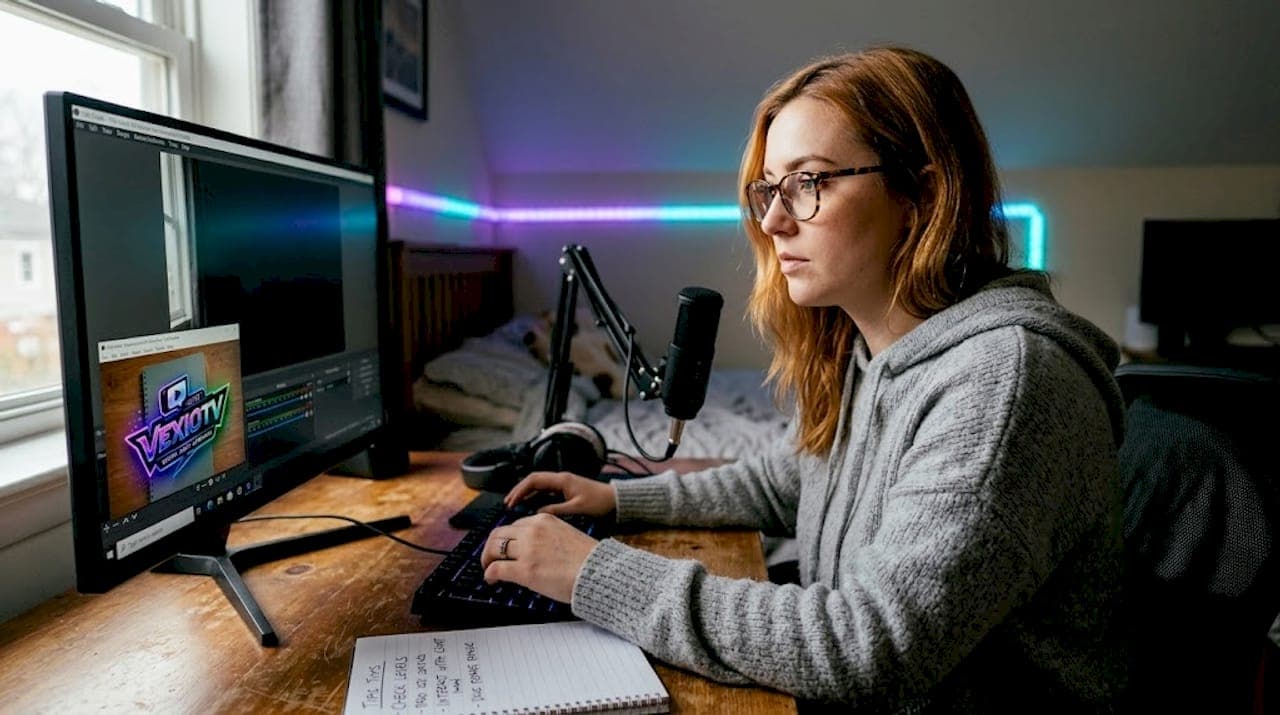
Audio matters: Standout sound for gamers, musicians, and performers
Once your foundation is set, great sound is the next critical ingredient to attract and retain viewers. Video quality gets a lot of attention, but poor audio is what actually makes people leave. A slightly blurry video stream is tolerable. Hissing background noise, echo, or clipping audio is not.
The most important upgrade most new streamers can make is ditching the built-in laptop microphone or webcam mic. Both pick up keyboard noise, room echo, fan hum, and ambient sound at a level that becomes very obvious to viewers.
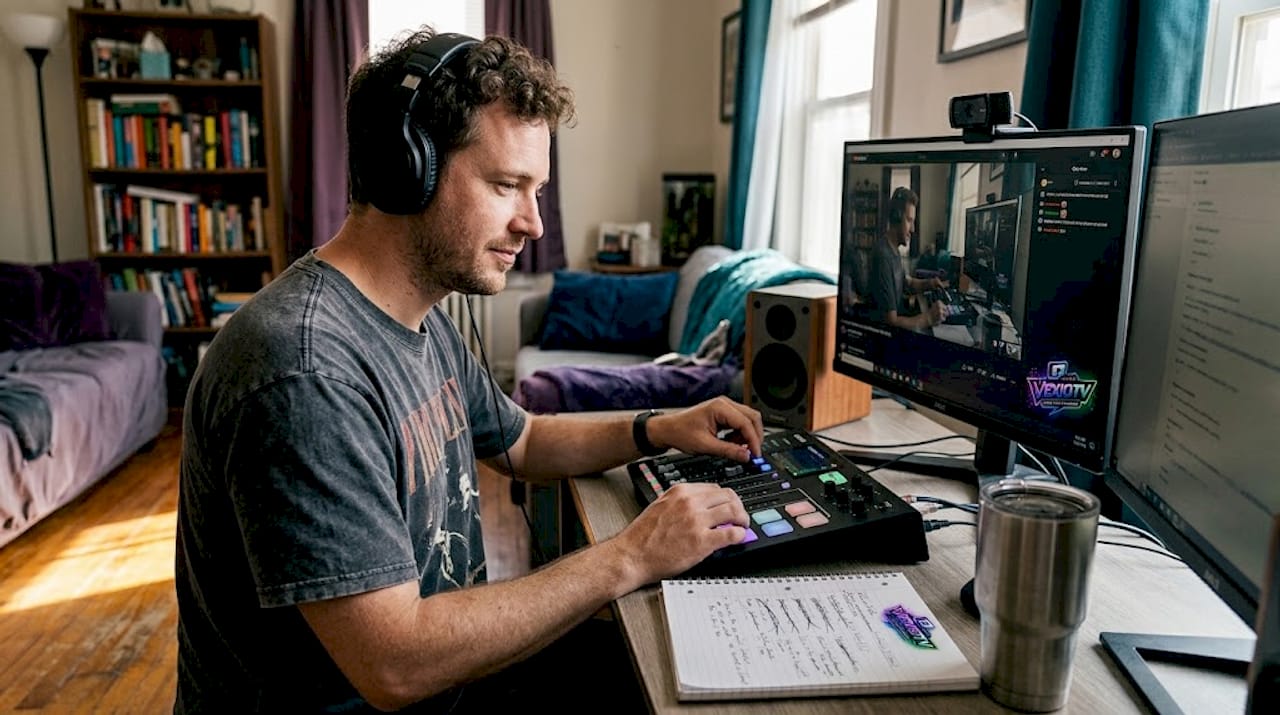
USB microphone vs. audio interface: Key differences
- USB microphone: Plug directly into your computer. Easiest setup. Good for gaming streamers and casual talkers. Examples include the Blue Yeti and HyperX SoloCast. Limited flexibility for routing multiple inputs.
- Audio interface: Connects XLR microphones and instruments. Gives you more control over gain, input levels, and monitoring. Better for musicians and performers. Requires a separate XLR microphone. Examples include the Focusrite Scarlett 2i2.
- Mixer: Useful when you have multiple audio sources, such as a microphone, instrument, and backing track. Adds complexity but gives you real-time control over each channel.
For gaming streamers, a USB microphone placed 6 to 8 inches from your mouth with a pop filter is a practical and affordable solution. For musicians and performers, properly routed audio through an interface is far more important than room acoustics or high-end gear — getting the signal path right matters more than the room you are recording in.
"Music and performance streaming needs especially clean, properly routed audio. Interface-based workflows and monitoring matter more than room mics or laptop mic inputs." — Concert News Online
Monitoring is often overlooked. Use closed-back headphones to listen to your own stream output while broadcasting. This lets you catch problems in real time rather than discovering them after the stream ends. Check out livestream tips for artists if you are a performer looking to build an audience through music streams.
Pro Tip: Ask a friend to join your stream on a separate device and report back on audio quality. What sounds fine to you locally can sound very different through the stream encoding and delivery process.
For music streaming engagement ideas and ways to keep your audience involved during audio-heavy streams, there are proven formats worth exploring. Clean audio builds viewer trust faster than almost any other single improvement.
Don't overlook your connection: Stable streams win
Great audio means little if your viewers can't even see or hear it smoothly. Your internet connection is the part of your setup that causes the most visible, immediate problems for viewers. And unlike software settings, connection issues can be hard to debug in the middle of a live broadcast.
Wi-Fi introduces problems that a wired connection simply does not. Radio interference, distance from the router, other devices competing for bandwidth, and signal dropouts all create jitter and packet loss. Jitter refers to small, irregular delays in data delivery. Even brief jitter events can cause dropped frames, audio desync, or stream disconnects. Ethernet for live streaming is consistently recommended precisely because it removes these variables.
| Factor | Ethernet | Wi-Fi |
|---|---|---|
| Stability | High | Variable |
| Latency | Low | Moderate to high |
| Packet loss risk | Very low | Low to moderate |
| Setup complexity | Requires cable run | Easy, wireless |
| Recommended for streaming | Yes | Only as a backup |
Signs your connection is hurting your stream:
- Dropped frames reported in OBS (check Stats window)
- Viewers reporting choppy video or audio cutting out
- Stream disconnecting mid-broadcast
- Bitrate fluctuating in your streaming dashboard
- High latency or rubber-banding in gameplay while streaming
If running an Ethernet cable is not practical, look into a powerline adapter or a MoCA adapter. These send your internet signal through your home's electrical or coaxial wiring, giving you a more stable connection than Wi-Fi without running a cable across the room.
Understanding what drives streaming industry growth also means understanding that viewers have high expectations now. A stream that buffers loses viewers to one that does not, regardless of content quality. Avoid the most common streamer mistakes by treating your connection as a core piece of equipment, not an afterthought.
Pro Tip: Before any important broadcast, run a 30-minute test stream and monitor the dropped frames percentage in OBS. Anything above 0.5 percent is worth investigating before you go live for real.
Respect copyright and music rights when streaming
Even with the perfect technical setup, it is essential to avoid legal missteps that can instantly derail your streaming journey. Copyright issues are one of the most common reasons new streamers get strikes, have their VODs muted, or lose their accounts entirely.
The core issue is public performance rights. When you stream music on a live platform, you are performing it publicly. Platforms like Twitch, YouTube, and Kick operate under specific licensing agreements with some music rights holders, but those agreements do not cover everything. Playing a popular song in the background of your stream can trigger an automated copyright detection system that mutes your VOD or files a strike against your account.
"Respect music licensing and public performance rights when streaming on platforms; licensing mistakes lead to strikes that can impact your entire channel."
For musicians streaming live performances of cover songs, the situation is more complicated. The fact that you are performing the song yourself does not give you the right to stream it without a license. Public performance of a copyrighted song in a live stream requires a license, regardless of whether you wrote it.
Copyright-safe music options for streamers:
- Music from royalty-free libraries such as Epidemic Sound or Artlist
- Creative Commons licensed music (check the specific license terms carefully)
- Music cleared by your streaming platform through their own licensing deals
- Your own original compositions and productions
- Music from Twitch's own Soundtrack tool or similar platform-native solutions
If you receive a copyright strike, respond promptly. Review the specific claim, check whether the content falls under fair use, and file a dispute if you believe the claim is wrong. Do not ignore strikes. Accumulating multiple strikes can result in channel suspension.
Stay up to date on streaming platform growth trends, including how platforms are evolving their music licensing approaches. Policies change, and what was tolerated last year may be actively enforced this year.
Quick comparison: New streamer musts at a glance
Now that you have seen the essentials, here is how they stack up — so you can quickly check where you stand and what to improve.
| Area | Beginner priority | Key action | Common mistake |
|---|---|---|---|
| Software | High | Use OBS Studio, set correct bitrate | Bitrate too high for upload speed |
| Audio | High | Use USB mic or audio interface | Using built-in laptop microphone |
| Internet | Critical | Use Ethernet, test before streams | Streaming over shared Wi-Fi |
| Copyright | Critical | Use licensed or original music | Playing popular songs as background |
| Test streams | High | Run private streams before going live | Going live without any testing |
Pre-stream checklist before you go live:
- Confirm your bitrate matches your current upload speed
- Test your microphone and check levels in OBS
- Verify your Ethernet connection is active and stable
- Check that your stream key is correct for the platform
- Preview your stream layout and overlays
- Run a one-minute private test stream and watch it back
- Make sure you have only licensed or original music queued
Knowing the types of live streams available to you also helps at this stage. Gaming, music, IRL, talk shows, and creative streams each have slightly different technical needs. Match your setup to your format. A music stream needs better audio routing. A gaming stream puts more load on your CPU. For creative live streaming formats that combine multiple elements, plan your setup accordingly.
What most new streamers get wrong — and what actually matters
Here is the part most guides skip. New streamers consistently spend the most time and money on the wrong things. A $300 microphone does not fix bad content. A $200 camera does not fix poor engagement habits. Gear is not the bottleneck for most beginners — behavior is.
The streamers who grow early are not the ones with the best equipment. They are the ones who show up consistently, respond to every viewer comment, and adapt their content based on what their small but growing audience responds to. A stream with five engaged viewers who get real responses is more valuable to early growth than a stream with 50 passive viewers who never get acknowledged.
Focusing on building interactive streams from the start creates a habit of engagement that scales. When you have ten viewers, you can talk to all of them. Build that habit now, and it carries forward when you have a hundred.
The other trap is chasing perfection before going live at all. Streamers who wait until they have the perfect mic, the perfect lighting, and the perfect overlay often never stream at all. The technical tips in this article are enough to produce a watchable, listenable stream right now. Ship the imperfect version. Improve based on real feedback.
Set clear, simple goals for your first 30 days. Stream a set number of times per week. Stick to a consistent schedule so viewers know when to find you. Focus on one content category. These habits matter more than resolution or encoder settings during the early stages of building an audience.
Ready to start your streaming journey?
You now have the technical knowledge and priorities to start streaming without the most common early mistakes slowing you down.
VexioTV gives new creators a direct path to going live. One click, no complicated setup process, and a platform built for gaming, music, and creative streaming. Access VexioTV streaming tools designed for creators at every level, from your first stream to your hundredth. Follow the start live streaming guide to apply everything covered here in a practical, step-by-step format. Sign up, go live, and build the community you want to create for.
Frequently asked questions
What equipment do I need to start streaming as a beginner?
Most new streamers need a stable computer, a USB microphone or audio interface, a webcam, and reliable internet, plus software like OBS Studio. You do not need expensive gear to produce a watchable stream from day one.
How fast should my internet upload speed be for live streaming?
Aim for at least 6 to 8 Mbps upload for 1080p streaming and 4 to 5 Mbps for 720p, and always use Ethernet for the most stable connection. Test your speed at peak hours, not off-peak, for a realistic number.
Can I stream music covers or DJ sets legally?
Platforms require licensed or original music, and streaming unlicensed covers can trigger automatic copyright strikes on your account. Use royalty-free libraries or platform-approved music to stay compliant.
What is the biggest technical mistake new streamers make?
Most beginners set their bitrate too high for their available upload speed, causing dropped frames and poor stream quality from the start. Always match your bitrate to your real-world upload bandwidth, not your maximum plan speed.
What is better for streaming: Wi-Fi or Ethernet?
Wired Ethernet is consistently better for streaming because Wi-Fi causes jitter and packet loss that disrupts audio and video sync. Use Ethernet as your primary connection and treat Wi-Fi only as a last resort.