TL;DR:
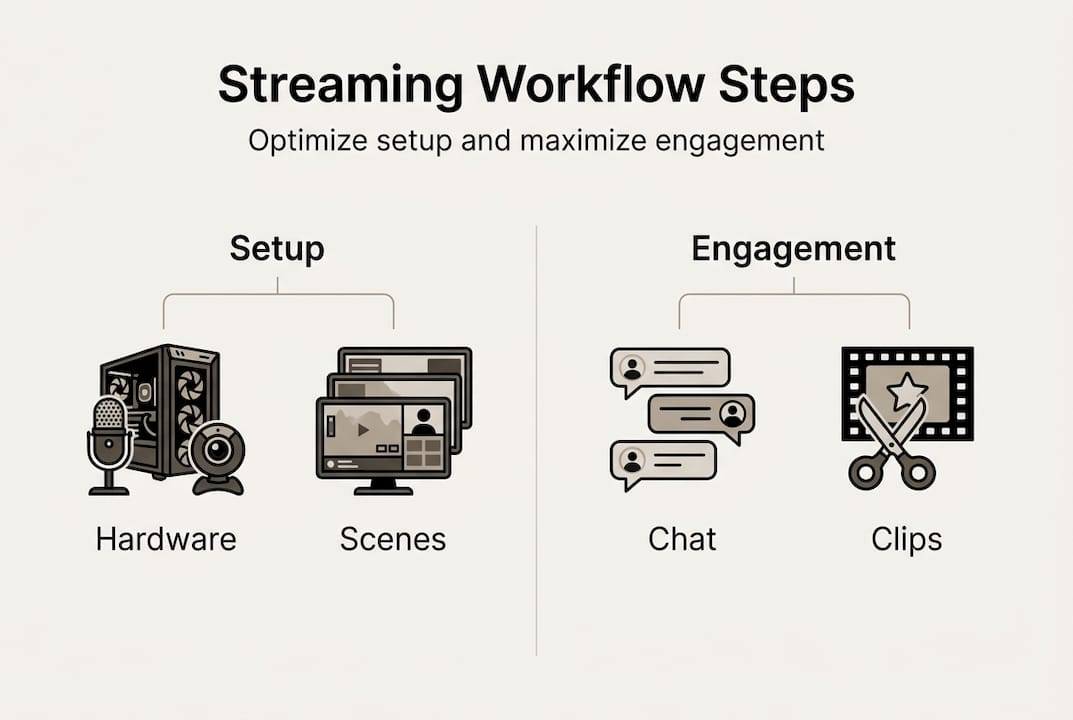
- A structured, repeatable workflow improves stream quality, engagement, and growth over complex setups.
- Consistency in scheduling and routine tasks boosts viewer retention more than hardware upgrades.
- Post-stream clipping and analytics review maximize content lifespan and audience development.
Scattered workflows cost streamers viewers, revenue, and momentum. When your setup is disorganized, you spend the first 20 minutes of a stream troubleshooting audio instead of playing. Viewers leave. Clips never get made. Growth stalls. A structured workflow covering pre-stream prep, the live session itself, and post-stream tasks changes all of that. This guide walks you through each phase with practical steps, expert shortcuts, and tools that keep your streams consistent, high quality, and built for community growth.
Table of Contents
- Essential tools and setup: Build your streaming foundation
- Pre-stream preparation: Workflow and checklist
- Going live: Maximize quality and engagement in real time
- Post-stream workflow: Clipping, review, and growth
- The truth about stream workflow: Consistency over complexity
- Level up your stream with VexioTV's resources
- Frequently asked questions
Key Takeaways
| Point | Details |
|---|---|
| Solid setup matters | Proper hardware, software, and settings prevent technical issues and support clear, stable streams. |
| Routine equals results | Consistent pre-stream and live workflows keep you focused and help your audience know when to tune in. |
| Engagement is everything | Chat interaction, challenges, and predictable schedules retain viewers and build community. |
| Post-stream growth | Clipping highlights, reviewing analytics, and scheduling improvements fuel continued channel growth. |
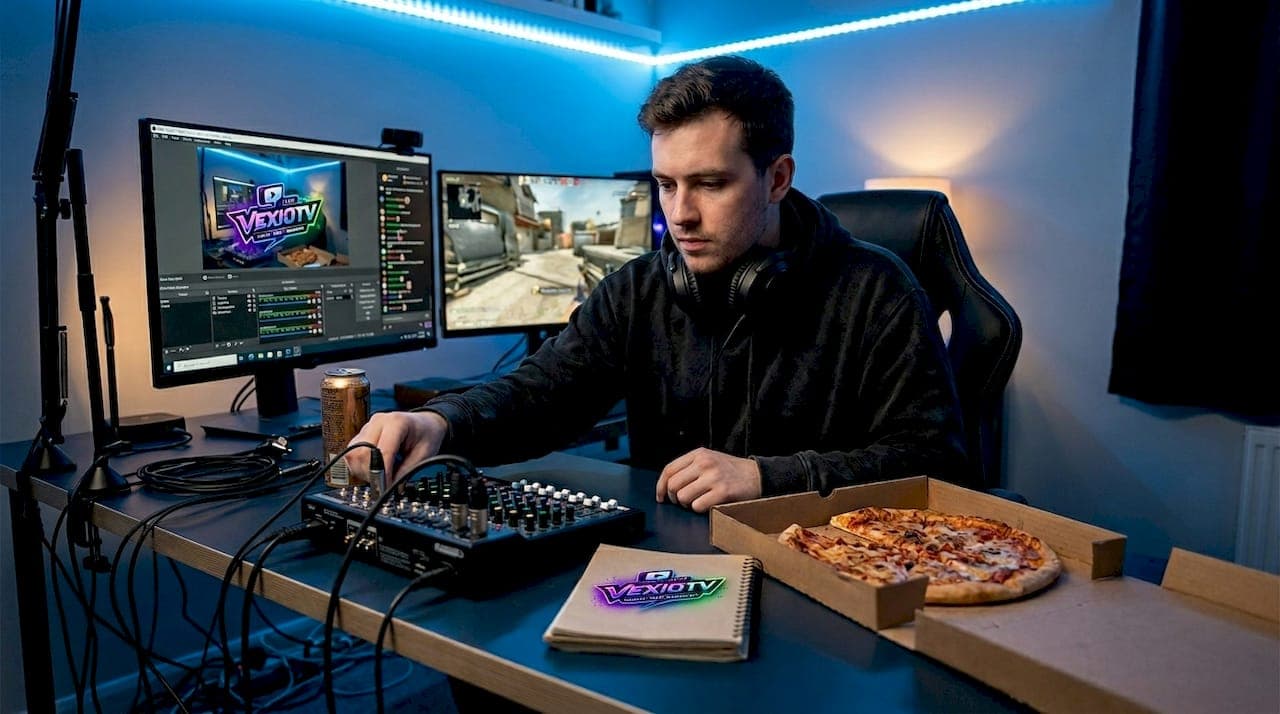
Essential tools and setup: Build your streaming foundation
Once you recognize the need for consistency, you will need to set up the right foundation. Your gear and software choices directly affect stream quality and viewer retention. You do not need the most expensive setup, but you do need the right one.
Minimum hardware requirements:
- CPU: Intel Core i7 or AMD Ryzen 7 (or better)
- RAM: 16 GB minimum, 32 GB recommended for gaming and streaming simultaneously
- GPU: NVIDIA RTX 3060 or AMD equivalent
- Microphone: USB condenser mic (Blue Yeti or similar)
- Webcam: 1080p at 30fps or higher
- Internet: Wired Ethernet connection, not Wi-Fi
For software, OBS Studio and Streamlabs are the two most widely used options. Both let you build scenes (a scene is a saved layout combining your gameplay, webcam, and overlays), set up alerts for new followers or subscribers, and manage audio sources. Start with one and learn it well before adding more tools.
Video and audio settings matter more than most new streamers realize. For 1080p60 streaming, use a 6000 Kbps bitrate, the NVENC encoder if you have an NVIDIA GPU, and at least 10 Mbps upload speed. These settings balance quality and stability without overloading your connection.
Follow a step-by-step live streaming setup to configure your scenes and sources before your first stream.
| Component | Recommended spec | Why it matters |
|---|---|---|
| CPU | i7 / Ryzen 7 | Handles encoding without lag |
| RAM | 16 GB+ | Keeps game and OBS stable |
| Microphone | USB condenser | Clear audio = viewer retention |
| Upload speed | 10 Mbps+ | Prevents stream drops |
| Encoder | NVENC (NVIDIA) | Offloads CPU, improves quality |
Connection issues are the most common cause of dropped streams. Always use a wired connection. Check your upload speed before going live using a speed test tool. If your upload drops below 8 Mbps, lower your bitrate to 4500 Kbps to maintain stability.
Pro Tip: Save multiple OBS profiles for different stream types. A gaming profile, a just chatting profile, and a low-bandwidth profile let you switch fast without reconfiguring everything from scratch. Review streaming best practices to fine-tune each profile.
Pre-stream preparation: Workflow and checklist
With your foundation in place, it is time to make pre-stream prep fast and foolproof. A repeatable checklist removes guesswork and reduces the chance of going live with a broken mic or missing overlay.
A solid pre-stream checklist starts with hardware and software setup, then moves into schedule planning. Run through these steps every time:
- Power on PC and launch OBS or Streamlabs
- Check all audio sources: mic, game audio, and alerts
- Verify webcam is active and properly framed
- Load the correct scene for today's game
- Test stream alerts (follower, subscriber, donation)
- Confirm stream title, category, and tags on your platform
- Do a 60-second private test stream to check quality
- Announce your go-live time on Discord or social media
Scheduling streams at consistent times builds audience retention. Viewers return when they know when to expect you. Even two or three set days per week outperforms daily streams with no fixed schedule.
| Task | Manual setup | Automated setup |
|---|---|---|
| Scene loading | Open OBS, select manually | Profile auto-loads on launch |
| Alert testing | Click each alert manually | Use alert test queue in dashboard |
| Stream title | Type each time | Use saved title templates |
| Announce go-live | Post manually each time | Schedule post via social tool |
Templates and presets save real time. Store your most-used stream titles as text snippets. Save OBS scenes as separate profiles for each game you play. Use Streamlabs or StreamElements to create alert presets so you are not rebuilding them every session.
Pro Tip: Record a short checklist video of yourself running through setup. Watch it back once. You will immediately spot steps you skip or rush, and that awareness alone tightens your routine.
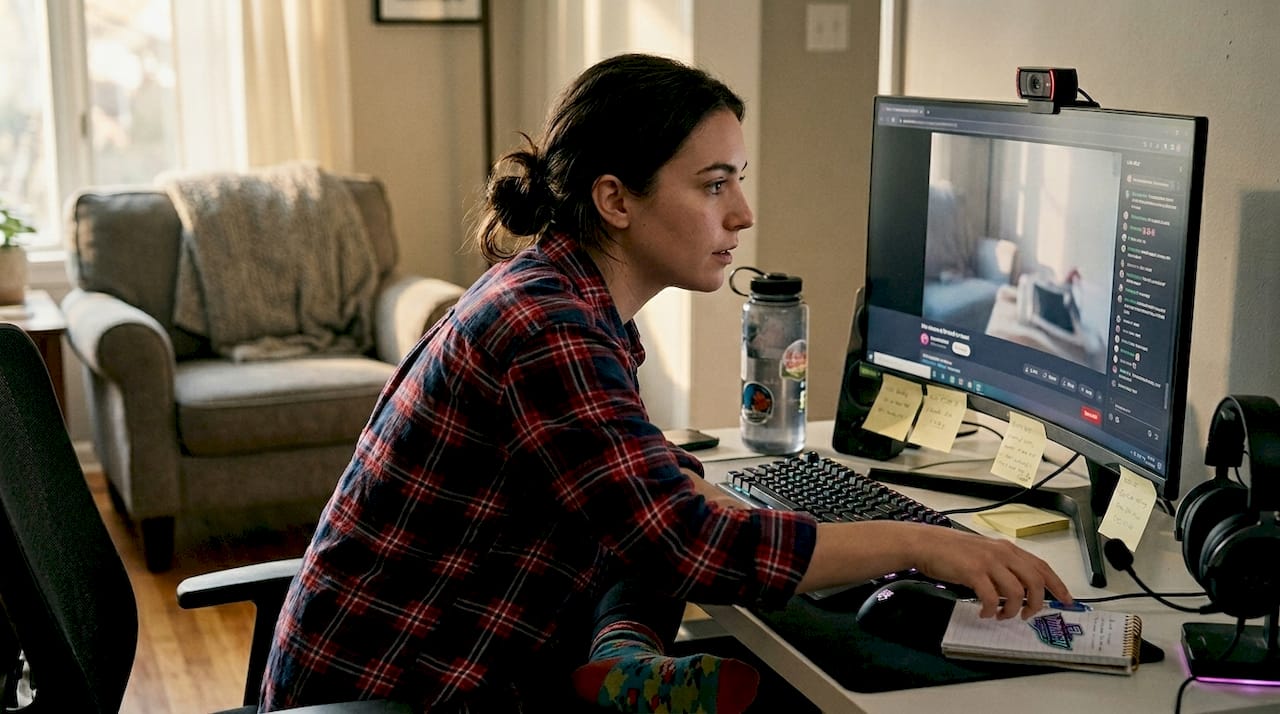
Going live: Maximize quality and engagement in real time
After the pre-stream routine, here is how to perform well when you go live. The live phase is where your prep pays off, but real-time decisions still matter.
- Click Go Live and confirm your stream is active on the platform
- Monitor your stream health dashboard for dropped frames or bitrate spikes
- Greet viewers by name as they join chat
- Activate your first interactive overlay or poll within the first 10 minutes
- Run a viewer challenge or question at the 30-minute mark to re-engage the audience
- Check audio levels every 20 to 30 minutes
Engagement moves keep viewers watching longer. Use chat interaction strategies like open-ended questions tied to the game you are playing. Ask viewers what they would do in a specific in-game situation. Run short viewer challenges where chat votes on your next move. These tactics turn passive viewers into active participants.
For interactive stream setups, tools like channel point redemptions and overlay triggers give viewers direct control over small stream elements. This increases session length and repeat visits.
Technical issues happen. Here is how to handle the most common ones:
- Choppy video: Lower bitrate to 4500 Kbps and switch to 720p60 resolution
- Audio sync issues: Use audio troubleshooting steps to add a sync offset in OBS audio settings
- Viewer drop-off: Shift activity, start a new challenge, or address chat directly
- Structured scenes for gameplay, webcam, and alerts keep transitions smooth and reduce confusion during live streaming
Do not panic over minor technical hiccups. Viewers understand that live content is unpredictable. Acknowledge the issue briefly, fix it, and move on. Staying calm keeps the energy positive and shows professionalism.
Building a live streaming community starts during the stream itself. Use predictable schedules and Discord to keep viewers connected between sessions. Weekly analytics reviews help you spot which stream moments drove the most engagement.
Post-stream workflow: Clipping, review, and growth
Once the stream is over, you are not done. The post-stream phase is where many streamers leave growth on the table by skipping content recycling and analytics review.
Here is an efficient post-stream routine:
- Flag your best moments during the stream using OBS replay buffer hotkeys
- End the stream and immediately note your top 3 to 5 highlights while memory is fresh
- Review chat spikes the next day (10 to 20 minutes) to find moments that drove the most reaction
- Batch edit and post 5 clips, which takes 45 to 75 minutes for a 4-hour stream
- Schedule clips for TikTok, YouTube Shorts, and Instagram Reels
Stat callout: Editing and posting 5 clips from a 4-hour stream takes roughly 75 minutes when you use the replay buffer and batch your editing. That is a small time investment for content that reaches audiences who never watch live.
Weekly analytics review checklist:
- Average concurrent viewers (ACVs) compared to last week
- Peak viewer count and what was happening at that moment
- Chat messages per minute during top engagement windows
- Follower gain per stream
- Clip performance on social platforms
Content recycling extends the life of every stream. Short clips posted to social media drive new viewers back to your channel. Use your analytics to identify which game, format, or segment performs best, then plan your next stream around those results. Track streaming platform growth patterns over time to spot trends.
Pro Tip: Use a simple spreadsheet to log your weekly stats. After 4 to 6 weeks, patterns become clear. You will know exactly which day, game, and format drives the most growth. Review common streaming mistakes to avoid habits that slow down your progress.
Understanding how streaming shapes gaming culture also helps you position your content within trends that already have audience demand.
The truth about stream workflow: Consistency over complexity
All the workflow steps above are useful. But here is what most guides skip: the biggest gains come from doing simple things repeatedly, not from buying better gear or adding more overlays.
New streamers often spend weeks perfecting their scene layout or saving up for a new camera. Meanwhile, streamers who go live on a fixed schedule with a basic setup and a reliable checklist grow faster. Viewers come back because they know when you stream, not because your overlay looks polished.
The best growth tool is a repeatable routine. Run the same checklist every session. Ask chat a question every 30 minutes. Review your analytics every week. These habits compound over time in ways that no gear upgrade can replicate.
Focusing on smart streaming strategies that reduce friction and save time is more valuable than chasing the latest streaming trend. A workflow that takes 10 minutes to set up and runs the same way every stream is worth more than a complex system you skip half the time.
Simplify. Repeat. Review. That is the actual formula.
Level up your stream with VexioTV's resources
Ready to take the next step toward smoother, more engaging streaming? VexioTV provides a direct path to going live with tools built for gaming and entertainment creators.
Explore the VexioTV streaming platform for resources, community support, and a one-click go-live experience designed for both new and experienced streamers. If you are just getting started, the beginner live streaming guide covers everything from your first scene setup to your first live session. VexioTV's creator-focused environment makes it straightforward to build an audience, engage your community, and grow your channel on your own schedule.
Frequently asked questions
What is the most important part of a gaming stream workflow?
Consistency in scheduling and a repeatable setup routine matter more than graphics or hardware. Predictable schedules directly boost viewer retention and long-term channel growth.
How do I quickly fix a choppy or laggy gaming stream?
Lower your resolution to 720p60, reduce bitrate to 4500 Kbps, and switch to the NVENC encoder. These three adjustments stabilize most choppy stream issues within minutes.
How much time should I spend editing and posting stream clips?
Plan for about 75 minutes to edit and post 5 clips from a 4-hour stream. Using the replay buffer and batch editing keeps the process efficient.
What simple actions boost live stream engagement the fastest?
Fixed stream schedules, direct chat questions, and viewer challenges drive the fastest engagement gains. Consistent schedules and Discord keep your community active between streams.