TL;DR:
- Choosing streaming gear requires a structured checklist prioritizing audio, video, lighting, and software to optimize setup and avoid unnecessary expenses. Ensuring high-quality audio first is essential, as poor sound quickly drives viewers away, while camera upgrades matter less initially. Real-world testing and adapting your configuration are crucial, since specifications alone do not account for room acoustics, lighting, or network issues.
Choosing streaming gear feels straightforward until you're staring at dozens of microphone options, three types of cameras, and half a dozen software tools with no clear starting point. The wrong purchase can drain your budget and still deliver a mediocre stream. The right approach is a structured checklist that organizes your decisions by priority, so every dollar you spend moves your setup forward. This guide breaks down the exact equipment you need across audio, video, lighting, and software, with practical comparisons and actionable steps for gamers, musicians, and creative performers alike.
Table of Contents
- The four pillars of a successful streaming setup
- Audio: The foundation of engaging streams
- Video and capture: Choosing the right camera setup
- Lighting and connectivity: Seeing and being seen clearly
- Software, encoding, and special setups for music streams
- Why the checklist isn't enough: Hard-won lessons from real-world streaming
- Build your best streaming setup with VexioTV
- Frequently asked questions
Key Takeaways
| Point | Details |
|---|---|
| Prioritize audio quality | Bad audio is the top reason viewers leave a stream, so invest here first. |
| Choose gear by content type | Select your camera, mic, and accessories based on gaming, music, or performance needs. |
| Reliable internet is essential | A wired connection and at least 10 Mbps upload speed will help keep your streams smooth. |
| Test before going live | Always run a test stream with your full setup to avoid surprises for your audience. |
| Iterate and refine | No setup is perfect the first time—keep testing and upgrading as you grow. |
The four pillars of a successful streaming setup
Every solid streaming setup rests on the same foundation, no matter what type of content you create. A streaming equipment checklist can be organized into four pillars: audio, video, lighting, and software/encoding. This structure keeps your decisions focused and prevents you from overspending in one area while neglecting another.
Here is what each pillar covers:
- Audio: Microphones, audio interfaces, headphones, mixers, and acoustic accessories
- Video: Webcams, DSLR or mirrorless cameras, action cameras, and capture cards
- Lighting: Ring lights, softboxes, key/fill light setups, and natural light management
- Software/encoding: Streaming apps, encoders, hardware encoder options, and platform settings
Most new streamers make the mistake of spending heavily on cameras while ignoring their audio. This is backwards. Poor audio ends streams faster than poor video. Before you buy anything else, plan your audio setup first.
Audio is consistently the first upgrade that makes a noticeable difference to your viewers. Fix your sound before you improve your picture.
Pro Tip: When reviewing your current or planned setup, listen to a test recording before you watch it. If the audio bothers you, your viewers will notice it too.
Now that the framework is in place, the next step is to fill in each pillar with specific, practical equipment choices.
Audio: The foundation of engaging streams
Good audio starts with a reliable microphone. For most beginner streamers, a USB condenser microphone is the fastest and most affordable entry point. Models in the $50 to $100 range deliver clear, broadcast-quality sound without requiring additional hardware. If you want more control over your audio signal, an XLR microphone paired with an audio interface gives you better sound shaping and more room to grow.
Key audio equipment for your checklist:
- USB condenser microphone: Best for beginners; plug-and-play setup with no extra gear needed
- XLR microphone: Better for serious creators who want long-term flexibility and quality
- Audio interface: Required for XLR microphones; adds gain control and input monitoring
- Closed-back headphones: Essential for monitoring your mix without sound bleeding into your mic
- Pop filter: Reduces plosive sounds ("p" and "b" sounds) that distort recordings
- Boom arm: Positions your mic properly and removes desk vibration noise
- Audio mixer: Useful if you are routing multiple sources, especially for music performance streams
The importance of audio quality is not a minor detail. Audio is repeatedly positioned as the most critical upgrade for streamers because viewers tolerate weaker video but bad audio drives them away fast. This pattern holds across gaming streams, music performances, and IRL content equally.
Musicians and multi-source streamers need to think beyond a single microphone. If you are performing live music, routing your instrument audio through a dedicated mixer before it reaches your interface prevents volume spikes and gives you real-time level control. This matters most when streaming high-energy performances where audio peaks can clip and distort quickly.
Pro Tip: Use your streaming platform's preview mode to run a full audio check before every stream. Listen for background hiss, room echo, and signal clipping. Fix these before you go live, not during.
Video and capture: Choosing the right camera setup
Your camera choice depends on your content type and your budget. For most new streamers, starting with a quality webcam is the practical move. Entry-level webcams in the $70 to $100 range offer 1080p resolution and solid low-light performance for desk setups. Mid-range webcams with autofocus and improved sensors handle most streaming scenarios without any additional equipment.
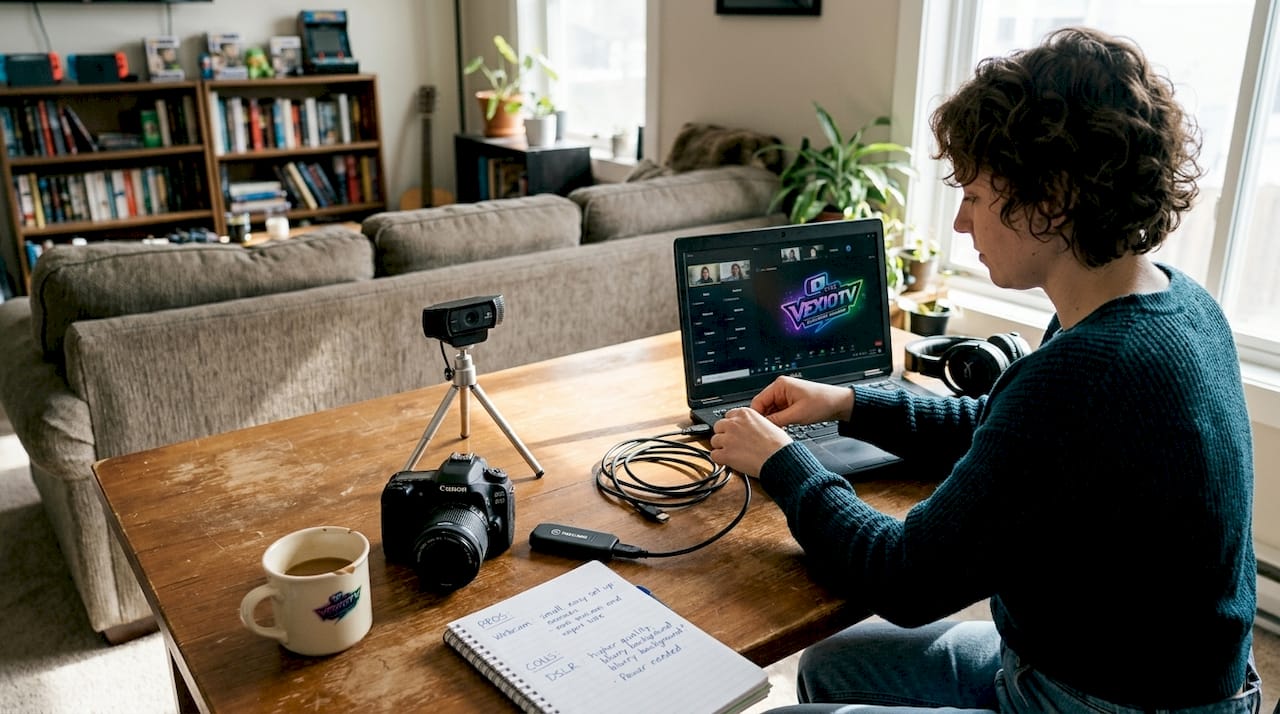
If you want cinema-quality visuals on your stream, a DSLR or mirrorless camera connected via a capture card or USB output gives you a major quality jump. This setup works well for music performers, artists, and streamers who want a professional on-camera look. The trade-off is cost and setup complexity.
Console gamers have a specific requirement. If you stream from a console, you typically need a capture card. If you stream PC games on the same PC, you often do not. This is one of the most commonly misunderstood aspects of console vs PC streaming setups. A capture card takes the HDMI output from your console and feeds it to your streaming PC, where your software can broadcast it.
Camera comparison table
| Camera type | Resolution | Cost range | Best use case | Key limitation |
|---|---|---|---|---|
| Webcam | 1080p | $50-$150 | Desk setup, casual gaming | Limited sensor size |
| DSLR | 4K/1080p | $400-$1,500 | Music, art, performance | Battery life, file size |
| Mirrorless | 4K/1080p | $600-$2,000 | Professional streams | Higher cost |
| Action cam | 1080p/4K | $150-$400 | IRL, active streams | Fixed lens, no zoom |
For streamers just starting out, check our guide on how to perform live online before committing to an expensive camera setup. Your stream format and delivery style matter more than camera specs when you are building an audience.
Pro Tip: Do not buy your best camera on day one. Stream for 60 to 90 days with a webcam first. Once your stream style is settled and your content is consistent, then invest in a camera upgrade.
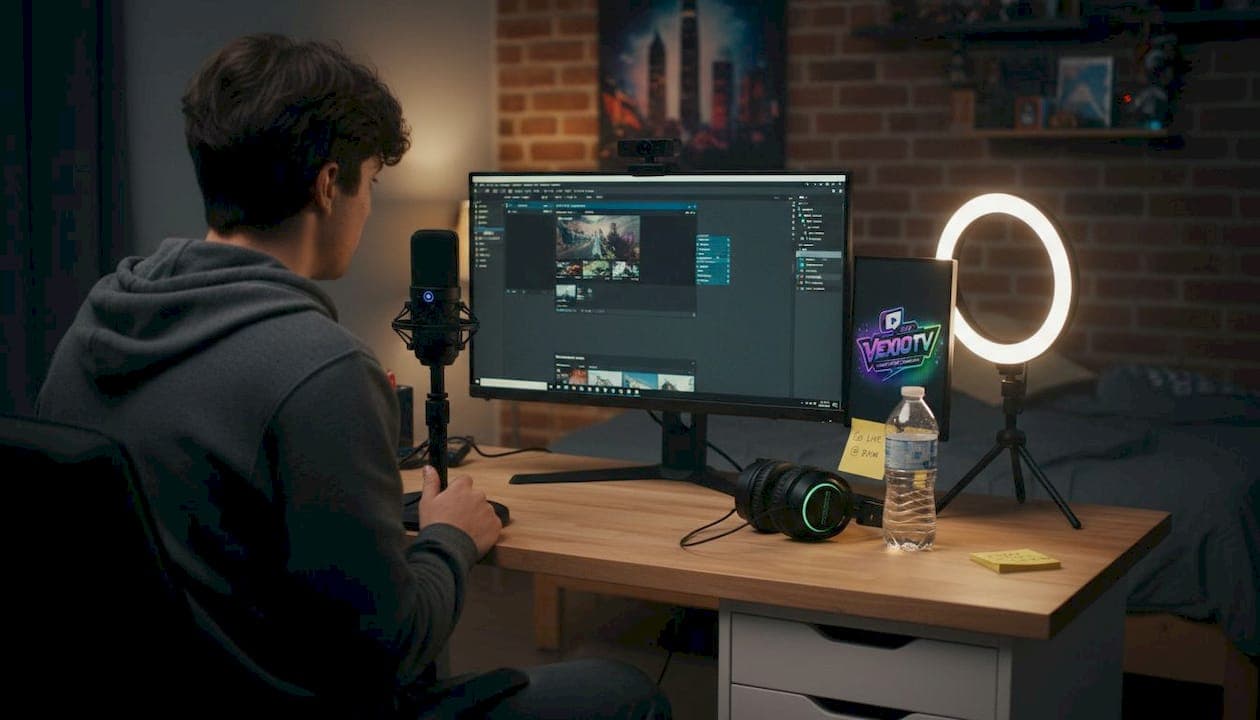
Lighting and connectivity: Seeing and being seen clearly
Lighting is the most overlooked and most affordable quality upgrade available to streamers. A $40 ring light can transform a flat, shadowy webcam shot into a clean, well-lit frame that looks professional. Natural light from a window works well but requires consistent weather and room positioning. Artificial lighting gives you full control.
Top lighting options by budget:
- Ring light ($30 to $80): Simple, effective, and ideal for desk setups; positions directly in front of you for even face illumination
- Softbox kit ($60 to $150): Larger, diffused light that eliminates harsh shadows; great for musicians or artists with more space
- Key/fill light combo ($100 to $250): Two-light setup that creates depth and dimension; used by professional streamers and video creators
Steps to test and set up your internet connection for reliable streaming:
- Connect your streaming PC or console directly to your router via Ethernet cable.
- Run a speed test to confirm your upload speed.
- Set your streaming bitrate to no more than 80% of your available upload speed to leave headroom.
- Run a 10-minute test stream and monitor for dropped frames or buffering in your software.
- If you see dropped frames, reduce your bitrate first before changing other settings.
For reliable streaming, use wired Ethernet and test before going live. Wi-Fi introduces packet loss and latency spikes that wired connections avoid entirely.
Recommended upload speeds by resolution
| Stream resolution | Bitrate needed | Minimum upload speed |
|---|---|---|
| 720p at 30fps | 3,000 Kbps | 5 Mbps |
| 1080p at 30fps | 4,500 Kbps | 8 Mbps |
| 1080p at 60fps | 6,000 Kbps | 10 Mbps |
| 4K at 30fps | 15,000 Kbps | 25 Mbps |
Avoid streaming over Wi-Fi if at all possible. Even a strong Wi-Fi signal can drop frames during periods of network congestion that a wired connection would handle without issue.
Pro Tip: Run a network speed test right before every stream, not just during setup. Internet speeds vary throughout the day and can affect stream quality even if your equipment has not changed.
For more on setting up your full environment, visit the lighting optimization tips resource to fine-tune your visual output.
Software, encoding, and special setups for music streams
The software layer connects all your hardware and sends your stream to your platform. OBS Studio is the most widely used free streaming software, offering scene management, audio mixing, and encoding controls. Streamlabs builds on OBS with an added overlay system and alert integrations designed for community-focused streamers.
Key software tools for your checklist:
- OBS Studio: Free, open source, highly customizable; the standard choice for most streamers
- Streamlabs: Built on OBS, includes built-in alerts and monetization widgets
- vMix: Advanced live production software for multi-camera setups (paid)
- Restreaming services: Tools that let you send one stream feed to multiple platforms simultaneously
Encoding is how your software compresses your video and audio for delivery. Software encoding uses your CPU to process the stream. Hardware encoding uses a dedicated chip in your GPU (such as NVIDIA NVENC or AMD AMF). Hardware encoding is more reliable for mission-critical streams because it frees your CPU for game performance and reduces the risk of frame drops under load.
For music and live performance streaming, the setup requires additional planning. Music and live performance streams need pro audio routing, synchronized playback, and reliable distribution. Server-side composition can help keep platform feeds consistent. This means routing your instrument and vocal channels through a mixer, sending that mix to your audio interface, and then into OBS before the stream goes out.
Checklist for keeping multi-platform feeds in sync:
- Use one high-quality RTMP or SRT output from OBS
- Send that feed to a cloud restreaming service rather than outputting separately to each platform
- Monitor your stream delay from a second device to catch sync issues early
- Set your audio delay compensation in OBS if your video and audio sources have different latency profiles
Pro Tip: Use OBS to send one high-quality feed to a restreaming service. This approach keeps your audio and video identical at the source and avoids the performance hit of encoding multiple separate streams on your machine.
Learn more about setup decisions and streaming best practices that protect stream quality as your setup grows. Musicians can also find dedicated workflow guidance in the music and live performance streaming guide.
Why the checklist isn't enough: Hard-won lessons from real-world streaming
A checklist tells you what to buy. It does not tell you how your specific room, computer, and content style will interact with that equipment. Most gear problems only show up under real-world conditions, such as during a live stream with an active chat, a full audio performance mix, and a game running at the same time.
Specs on paper do not account for room acoustics, lighting reflections, or network congestion. A microphone that sounds clean in a treated studio sounds thin and echo-prone in a bare-walled bedroom. A camera rated for 1080p60 may drop to a lower frame rate when your streaming software is also encoding at full quality. These issues are not visible until you test under real conditions.
Iteration matters more than gear. Streamers who test weekly, adjust their settings, and respond to viewer feedback consistently outperform those who buy better equipment and assume results will follow. The checklist is a starting point, not a finish line.
The three most common mistakes new streamers make despite having a solid checklist:
- Skipping the test stream: Going live without a dry run means discovering problems in front of your audience instead of fixing them beforehand
- Upgrading equipment before optimizing settings: Many streamers buy new gear when adjusting bitrate, encoding preset, or audio gain would solve the issue
- Copying someone else's setup exactly: Your room, internet connection, and content type require a different configuration than another streamer's
If you are still building your foundation, start with the basics covered in how to start live streaming and build from there based on real feedback from your own streams.
Build your best streaming setup with VexioTV
You have the checklist. Now you need the right platform to put it into action.
VexioTV is built for content creators who want to go live without friction. Whether you are streaming games, performing music, or creating IRL content, VexioTV gives you a space to connect with an audience and earn from your streams. The platform is designed for both new and experienced streamers. Sign up, go live with one click, and start building your community today at VexioTV.
Frequently asked questions
Do I really need a capture card to stream games?
You need a capture card to stream from consoles, but not for most PC-to-PC setups where the streaming software reads your game directly.
What is the minimum internet speed for high-quality streaming?
A minimum 10 Mbps upload speed is recommended for stable 1080p60 streaming, with wired Ethernet strongly preferred over Wi-Fi.
Is audio or video quality more important for viewers?
Viewers tolerate lower video quality far more than poor audio, which drives churn quickly and is consistently ranked as the top priority to fix.
What software do most streamers use?
OBS Studio and Streamlabs are the most popular streaming software choices for creators at every level, and both are free to use.
How can musicians or artists keep their audio and video in sync on platforms?
Sending one high-quality feed from OBS to a cloud restreaming service keeps audio and video identical at the source and avoids sync drift across platforms.